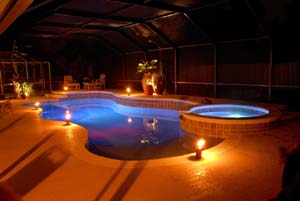
After the design and price are agreed upon, the contract is written up. Pool Captain immediately sends the plans to the surveyor, and gathers needed documents for permitting. Here is a brief overview of what to expect in terms of how the process moves along.
Remember, each pool is different, so this may vary depending upon the size and complexity of your particular job.
1. Permitting. Six weeks to Eight weeks after we receive the permit back from your City or County, you are swimming!
2. Layout pool. Outline pool with wood framing to match the print shape. Any fence panels needed to be removed to gain access are removed.
3. Dig. A backhoe digs the pool, and workers hand shape the walls. Payment Draw Due.
 4. Steel. Wire mesh and steel rebar is placed in the pool hole for reinforcement creating a basket like structure.
5. Preliminary Plumbing. Any plumbing that will not be accessible after the concrete is sprayed is installed now. This includes things like the main drains, any floor cleaners or caretakers, wall jets and returns, faountains, etc.
6. Shoot Gunite. High PSI concrete is sprayed into pool shape covering “wire basket” like structure. Walls will be approx. 6” thick when completed this stage, and floor approx. 12” thick. Payment Draw Due.
7.Pre-grade. Any extra dirt removed from the pool hole has been removed, forms are removed and deck area is graded.
8. Plumbing. 2” plumbing pipes are run from the pool to the equipment location. All lines are connected and the contractor runs a pressure check to be certain there are no air leaks (any air leaks would become water leaks once water is added to the pool. Cover in- ground plumbing with dirt.
9. Form Deck. Perimeter of deck, any steps or risers and planters are framed with wood.
10. Form Deck. Perimeter of deck is formed with wood. Plumbing is covered. Deck drains are installed.
11. Set Tile. Waterline tile is applied.
12.Power. Electricity is run to the equipment, panel is set, deck is grounded, light is installed, and equipment is hooked up.
13. Pour Concrete Deck. Concrete Decking is poured as 4” slab with drainage and pitch. Payment Draw Due.
14. Apply Deck Top. Acrylic texture is applied or pavers are set.
15. Screen Enclosure. Aluminum screen enclosure is built on site.
16. Clean-up. Your pool is almost finished! The sub-pumps are turned on and the interior of the pool shell is cleaned with an acid wash.
17. Interior Finish Applied. Marcite or exposed aggregate finish is applied. Final Payment Due.
18. Fill with Water. This may take up to 2 days.
19. Start-Up. Chemicals are added to balance the water chemistry, pump is turned on, pool is cleaned. It is important that
20. Sod, Seed, & Landscaping. Any grass or landscaping destroyed during construction is replaced per contract and yard is cleaned up. Any fence removed for access is replaced.
21. Pool School Begins. One day a week for 4 weeks, the owner and builder representative meet in order for the new owner to learn how to use all of the pools equipment.
22. Go Swimming!
Your cholesterol or blood pressure reading came back high forum I am sure this paragraph has touched all the internet people, its really really good paragraph on building up new web http://eurekaparks.com/de928393.html.
Filed under: Concrete Swimming Pools • Inground Swimming Pools
Like this post? Subscribe to my RSS feed and get loads more!


